Folding, Rolling Chop-Saw Stand
Update 8/8/2018;
fixed broken link to construction drawings
Update 9/9/2013:
Added construction drawings & material lists below per numerous requests from readers.
Update 9/5/2013:
This post was featured by Kreg on their facebook page (https://www.facebook.com/kregjig) which led to 30+ shares across the world — even some in Russian & Spanish — and more traffic than this blog has ever seen.

Screencap of Kreg’s Facebook feature of my project!
There were lots of great comments and lots and lots of folks asking for shop drawings. I’m going to work on some, but don’t have anything to put up immediately as I just built this as I went.
Update 11/3/2013:
I posted this project and a link to the blog at the BT3central’s finished project forum (http://www.bt3central.com/showthread.php?t=58769). Some interesting Q&A and discussion there. The folks on BT3central.com are always such a great resource!
I don’t have a lot of room in my garage for tools — certainly not enough space for a full-length chop saw setup. Accordingly, I built this rolling solution which has folding wings. It doesn’t take up a lot of space when its not in use, but if I fold out the wings, I have about 3′ of fence on each side of the saw. I also mounted the fence on t-tracks using a slot. This way, if I get a different saw, I can adjust the fence to match and I can slide the fences extra wide if I need additional length.
I mounted the saw on a plywood tool bed which is on adjustable bolts. This way, I can adjust the height of the saw to be exactly level with the wings (even if I get a different saw).
I built the fence using the Kreg KMS8000 Precision Trak and Stops Kit (amazon). The stops which come with the kit are extremely stout. Even after crashing multiple pieces of heavy wood into the stops, they don’t move. The measuring tapes are accurate to at least 1/64th once you’ve dialed them in with the adjustable vernier windows.
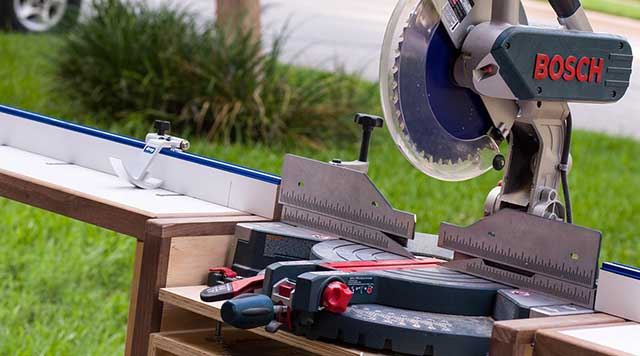
Front View of Folding, Rolling Chop Saw Stand with Bosch 12″ Miter Saw mounted on top

Front Right View of Folding, Rolling Chop Saw Stand

Front Right View of Folding, Rolling Chop Saw Stand with Wings Folded

Rear Detail View showing the fold-in Wing Support in Raised Position

Rear Detail View showing the fold-in Wing Support in Lowered, Folded Position

Detail of Fence Assembly on Folding Wing


Detail View of Tool Bed Height Adjustment Screws

These bolts allow the height of the chopsaw tool bed to be adjusted level with the wings
Detail View of Folding Wing Height Adjustment Screw

These bolts allow the height of the wings to be adjusted level
Shop Drawings
Files
You can download a printable version of these plans as a PDF file here (2MB).
You can download this project as a sketchup model here (3.24MB).
Illustrations


Hardware List
|
Cutlist
|
Wood Cutting Layout Diagrams
(1) 8’ long piece of 1×6 or 1×8 hardwood is required
Cutting Diagram for Hardwood if you use a 1×6
or
Cutting Diagram for Hardwood if you use a 1×8
(2) 4’x8′ pieces of 3/4″ plywood is required
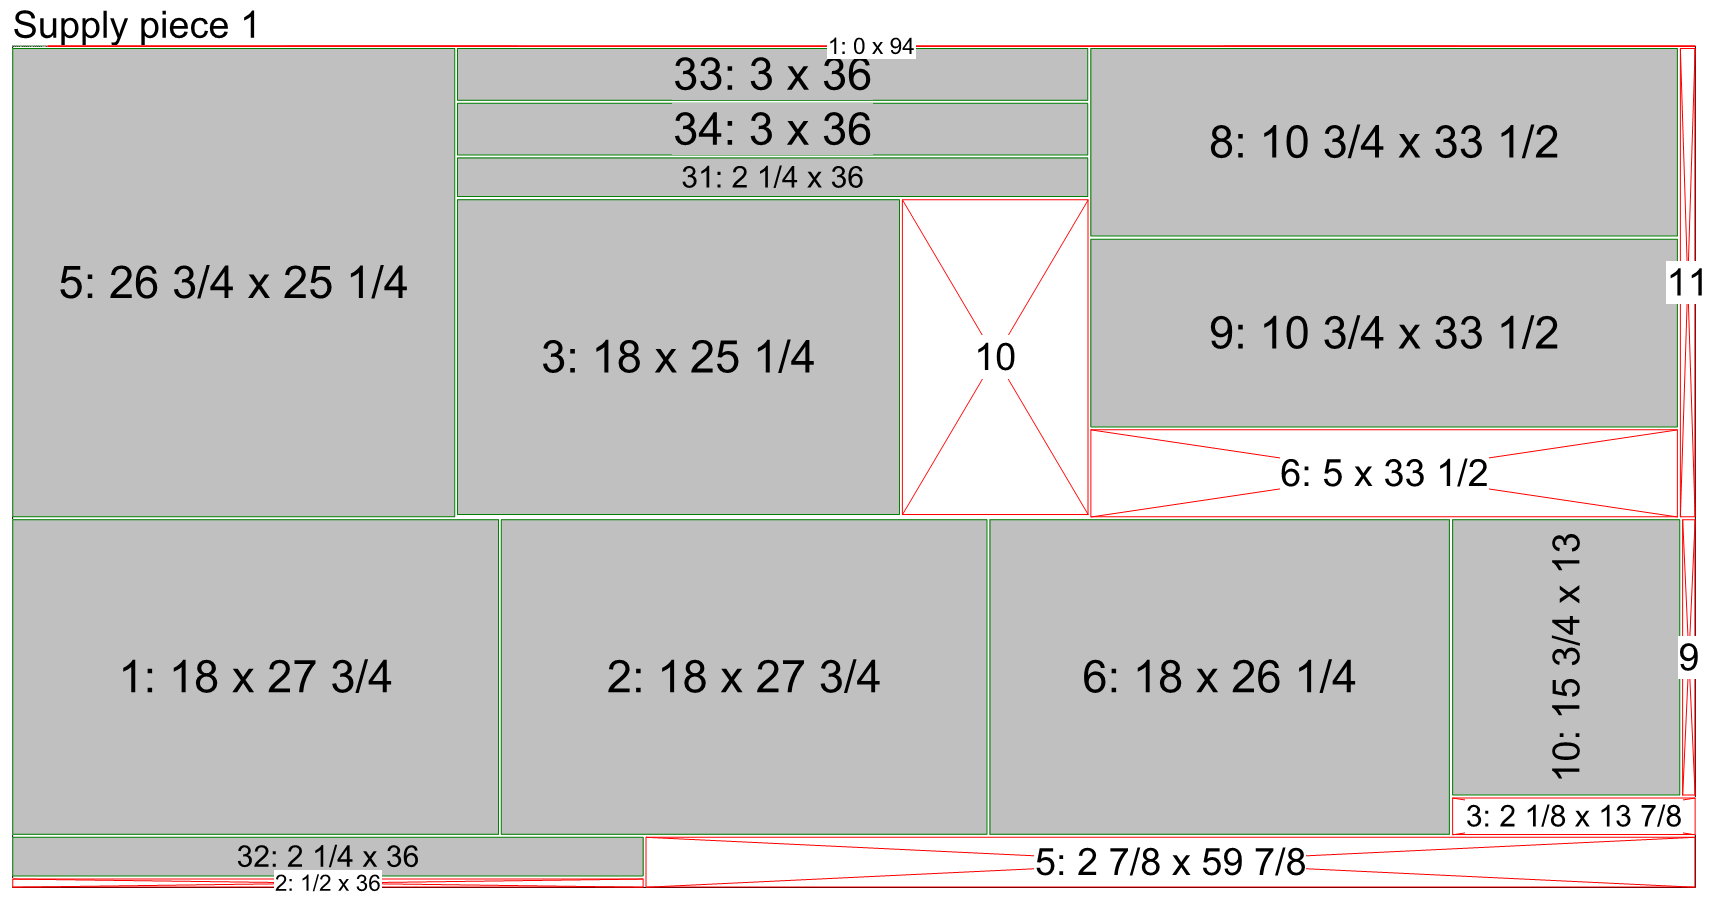
Cutting Diagram for plywood sheet #1

Cutting Diagram for plywood sheet #2
Step 1: Build the Case

Illustrated Isometric View of Case

Illustrated Front View of Case
The top, bottom & back are set into ¼” deep x ¾” wide dados for strength. Here is a view of the left side’s dados:

Here’s a detail view of the mounting of the tool platform.
Step 2: Build the Wings

Illustrated Isometric View of Wing from Underneath
I built my wings using wood covered in laminate. However, regular plywood is fine too.
I used a Kreg pockethole jig to mount the trim to the underside of the wing.
Wait to mount the routed block which catches the adjustment bolt until the end of the build.
Step 3: Build & Mount the Wing Riser

Illustrated Front View of Wing Riser

Illustrated Isometric View of Wing Riser Mounted on Case
Step 4: Build the Hinged Wing Support

Illustrated Isometric View of Hinged Wing Support
Step 5: Build the Fence
The fence is simply 2 pieces of wood joined with a glued & screwed butt joint. I mounted my fence using a wooden slot with adjustable knobs which slide in T-track. This lets me adjust it if I get a different saw and it lets me adjust the width of the fence. I can slide the fences away from the saw if I need to cut something extra long.
I installed a Kreg KMS8000 Precision Trak and Stops Kit on my fence which provides exceptional accuracy.
I have the same problem in my small basement this would sure solve a lot of problems
I want one!
how can we get plans for this stand,
Are there plans available for this? Would definitely build one.
Would like to get plans for this too? I would like to build one for cutting long pieces of wood…
That is so awesome! Thanks for sharing!
Would like a plan too. Where can I get one? Is it available online?
Updated this blog post per requests for constructions drawings & material lists. Enjoy.
David,
Any chance you are still keeping this site alive and the plans still exist? The PDF link to dropbox seems to be dead.
Hi Jim, I have updated the links in post. Thanks for letting me know.
Great detailed job. Thanks for sharing with us.